Clay Crevice & Cleft Construction

In early April, Josef Halda stayed with us, putting the finishing touches to the lectures he brought for his NARGS North American tour. I have always admired the vertical, cleft formations that are so often seen in Czech trough and alpine gardens and imagined that they must be painstakingly constructed and slow to mature. Regardless, I was interested in knowing the process, and having Halda here provided an excellent opportunity to learn.
As it turned out, the whole affair was far easier than I imagined, and the results accrue very quickly. Once I had seen the process, I wondered why I had never been able to figure it out. It was that simple. When I explained To Josef what I wanted to see, he went to the tufa yard and chose quite ordinary-looking stones that could be split along the sedimentation lines. This tufa was from a denser, layered formation that splits on its rift lines quite predictably; and, Josef indicated that it is very similar to the stone they have in the Czech Republic. The breaks are clean and angular making it easy to bring pieces closely together. For a trough, one piece can be split into 2 or 3 pieces. These pieces are book matches and will then form the basic crevice(s).
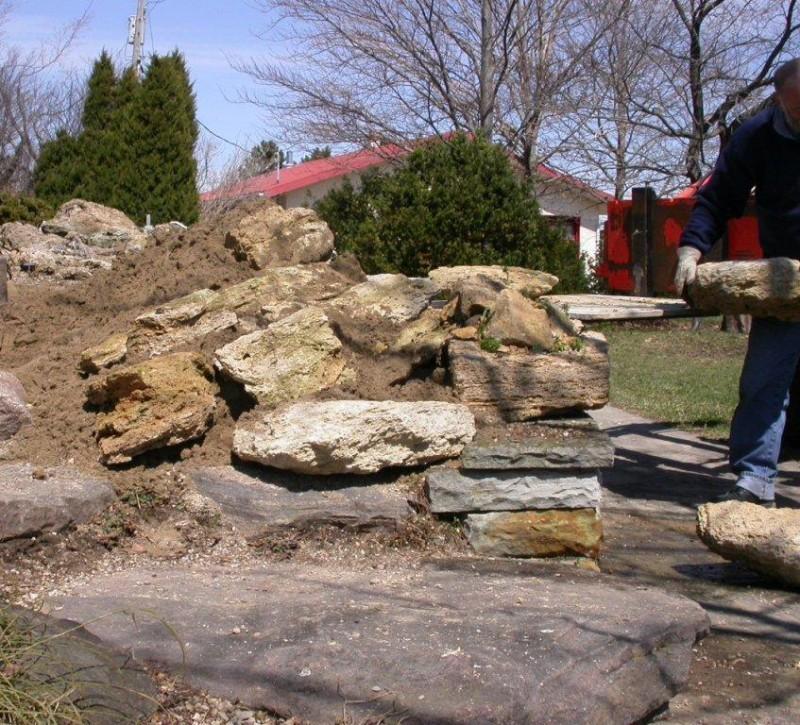

To glue the slabs together a paste of clay is made with some sand added. We used Spanish River Carbonatite as its grain size was acceptable and it would provide added nutrition. While one could dig clay from the backyard, it is easier to buy a bagged mason's or refractory clay from a hobby store. Measure out 3 parts clay to 1 part sand and mix the 2 together thoroughly as dry materials. Then slowly mix in water until a sticky paste is formed. Using a flat spatula, the clay paste is applied to one side of the crevice to ~10mm thickness.
Now the daring parts, for us Josef did this outside during a week when it froze solid every night, and all the plant material was from the heated greenhouse! The plants were bare-rooted whether they be cutting, seedling or potted plant. The roots were splayed out on the side smeared with clay, the crown set just above the crevice. The matching piece is then gently brought into contact, and the 2 were pressed/tapped together to eliminate any voids. That is the basic method.
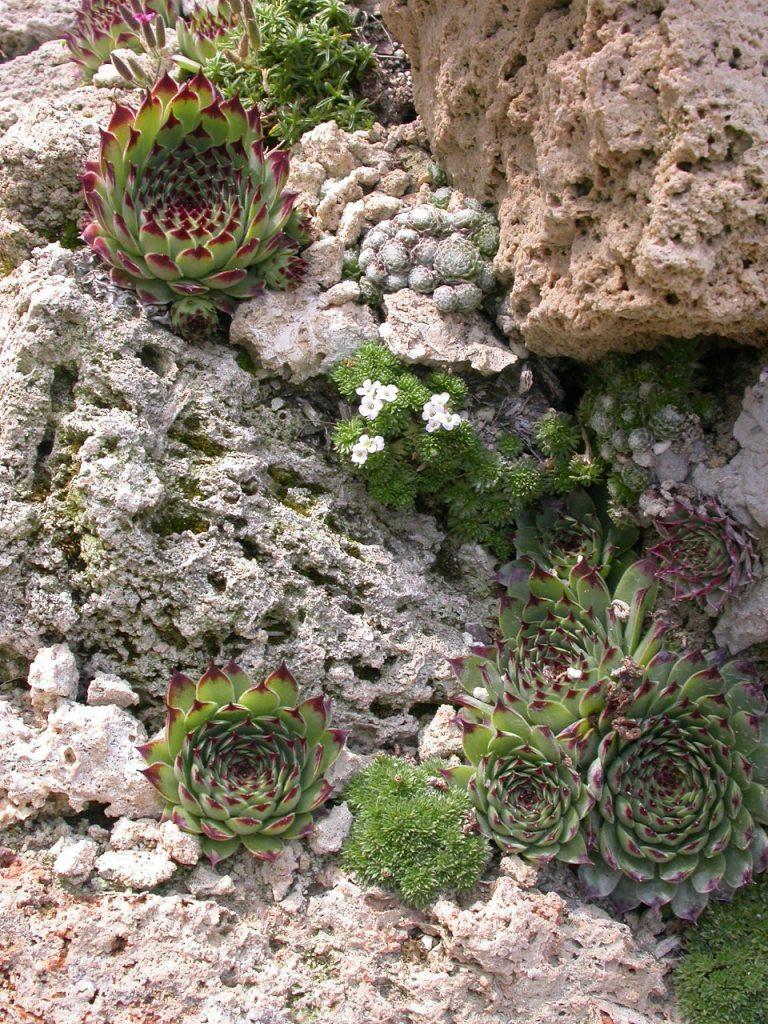
Why does it work? This is a process that closely mimics actual crevice conditions in nature. Heavier, clay/silt materials will accumulate in such formations because the particles stick together and do not wash away, as sand on gravel would. Provided a crevice is elevated and does not sit in water, it will not collect excess moisture. Neither will it dry out as quickly. In effect, the moisture level remains within a range suitable to plant growth. Clays have far more surface area for cationic activity and will provide better nutrition. Although the use of clay seems counter to most published advice regarding "drainage", elevating the piece will ensure that over saturation never occurs.
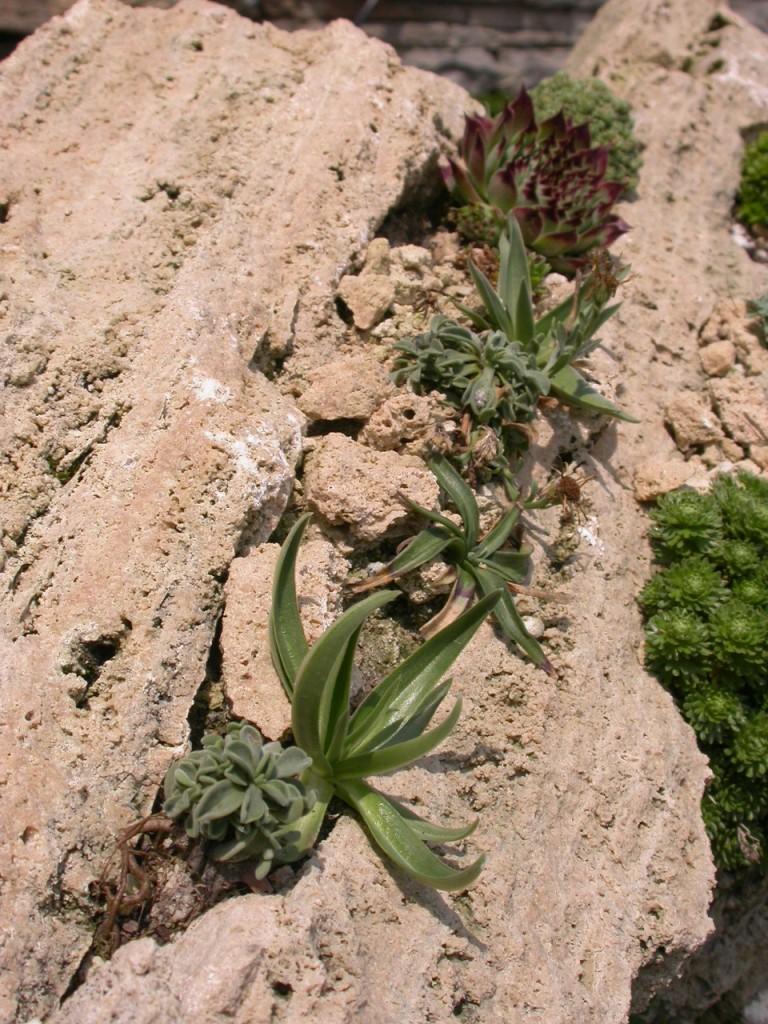

Watching Josef choose plants and where he placed them was also very instructive, as he has a huge amount of actual field experience. Many of his choices were new seedlings from the winter's sowing, including some eritrichum aretioides, gentiana spp. and androsace spp. from West China. He was very happy to see them and have the use of them. All were lined up in the crevices - both vertically and horizontally, adding dimension to the planting. Useful too, are small mat/cushion plants such as arenaria spp., silene acaulis, gypsophila aretioides and salix spp. In these mats, gentiana spp., primula spp., and others will grow comfortably, again replicating what will happen in nature.
From what we have observed so far, this is a great improvement in cultural conditions and our control over them. As a bonus, lots of sensitive species can be grown this way. Perhaps even more importantly, the stylistic side of culture is greatly enhanced. The use of vertical plantings produces drama, and even quite ordinary plants become riveting when displayed this way.

(July 2009)
Comments (0)
Add new comment